Maybe you've heard, read, or thought that veneering is a difficult process. This is far from true and it doesn't take much to learn the basics. The methods are simple, the tools and supplies are readily available, and the learning curve is short and straight-forward. Over the many years that this website has been available, I've received countless emails from hobbyist woodworkers and seasoned professionals who wished they had learned about veneer and veneering sooner. Even non-woodworkers have expressed the simplicity of applying a veneer once they understood the basics.
Here's what you need to get started in veneering:
- Veneer - The thin wood that is applied to the surface of the project
- Substrate - The material to which veneer is applied (MDF, plywood, etc.)
- Veneer Glue - Bonds the veneer to the substrate
- Glue Roller - Applies the glue to the substrate
- Veneer Softener - Used to make wavy veneers flat
If you plan to join two or more veneers together, you'll need the items listed below. For more information about jointing veneers, click here.
 |
| VeneerSupplies.com has almost 5,000 veneer related products in stock including all of the tools and supplies mentioned in this article. You'll find everything you need to get into veneering quickly and affordably. By making your purchase at VeneerSupplies.com you are supporting the free articles found here at JoeWoodworker. |
|
|
|
Applying Veneer
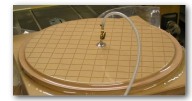
There are several ways to apply veneer and each method has advantages and disadvantages. Vacuum veneering is considered to be the easiest and most reliable method of attaching veneer to a substrate. Here's a list of the components in a vacuum pressing system.
The Vacuum Press System 
The vacuum press is the device that removes the air from within the vacuum bag. There are two types of vacuum presses. The auto-cycling vacuum press runs automatically by measuring the vacuum level inside the system and turning on or off as required to maintain a given level of vacuum. The continuous-run vacuum press is simply left running for the duration of the pressing time. Click here for more information.
 The Vacuum Bag The Vacuum Bag
Think of it as a giant sandwich bag (aka "Zip Lock" bag) in which the air is removed by a vacuum source such as an air-powered venturi or an electric vacuum pump. This creates approximately 1700 lbs per square foot of evenly distributed pressure inside the vacuum bag which is perfect for vacuum veneering. Check out this link for more information about vacuum bags.
The Platen
 Platens, which are typically made of melamine board or MDF, help to distribute the pressure inside the vacuum press bag evenly through air channels created by cutting grooves on one side of each platen. Some users prefer to use two platens (one platen on the top and one on the bottom of the veneered project) and others prefer to use one platen on the bottom and simply use breather mesh on the top side. More information about breather mesh can be found by clicking here. Platens, which are typically made of melamine board or MDF, help to distribute the pressure inside the vacuum press bag evenly through air channels created by cutting grooves on one side of each platen. Some users prefer to use two platens (one platen on the top and one on the bottom of the veneered project) and others prefer to use one platen on the bottom and simply use breather mesh on the top side. More information about breather mesh can be found by clicking here.
The Substrate
A substrate is the material to which a veneer is bonded. Typical substrates for furniture making are MDF, MDO, plywood, and particle board. I've written a short article about veneer substrate which you might find helpful.
The Vacuum Press Process
If you have the tools and supplies mentioned above, then you are probably ready to apply a veneer to your panel. Let's get going!
- Set up the vacuum press and bag on your workbench. Don't worry about connecting the vacuum press to the bag yet.
- Insert the bottom platen into the vacuum bag.
- Cut the face veneer, balance veneer and substrate to size as shown here.
- Prepare the substrate by sanding both sides with 80 grit sand paper and wipe of any dust.
- Apply veneer glue to the back side of the substrate. Here are some tips for the gluing process.
- Lay the backer veneer onto the glue and then turn the panel over so that the backer side is on your workbench.
- Apply glue to the face side of the substrate.
- Lay the face veneer onto the glue.
- If you are concerned about the veneers shifting on the substrate as you slide it into the vacuum bag, use blue painter's tape to secure it. Simply place a piece of tape on each side going from the top veneer around the substrate edge and then to the bottom veneer.
- Insert the veneer panel into your vacuum bag so that it is on top of the bottom platen. Be careful that the edges of the veneer do not get caught on the bag as you slide it in.
- Insert the top platen (with the grooved side up) into the bag. Again, exercise care so that the platen does not catch and tear the veneer face. Make sure that one of the grooves in the platen is directly under the bag stem on the vacuum bag.
Alternatively, use breather mesh instead of a top platen. This is the method preferred by most vacuum press users.
- Apply the closure to the bag.
- Attach the vacuum press hose to the bag stem on the vacuum bag.
- Turn on your vacuum press and make sure the gauge reaches at least 18" of Hg.
- Refer to the instruction label on the glue bottle for the recommended length of pressing time to "set" the glue. Do not leave the vacuum press system running unattended.
- When the glue has set, remove the panel from the bag and allow it to "cure" as described here.
- Trim the panel to size once the glue has cured using a table saw with a fine tooth blade. Cut with the good/show side of the panel facing up and keep the blade on the saw as high as possible and within the limits of safe use. This will minimize tear out on the top side of the panel.
No Vacuum Press? No Problem!
There are times when a vacuum press just is not feasible for a project. Whether it's because the project is too big to fit inside a vacuum bag or too small to invest in a vacuum press, there are other ways to successfully veneer a project.
- Weight/Clamp Veneering
- Iron-On Veneering
- Contact Cement Veneering
- Flex-Pro Veneering
- Hide Glue Veneering
- Paperbacked Veneering
Learn more about veneering without a vacuum press at this page.
 Veneering Video Lessons Veneering Video Lessons
There are several video's on YouTube but nothing comes close to the comprehesive video lessons from Hendrik Varju. His latest 5-DVD set entitled "Simple Vacuum Veneering" shows various project uses for the Project: EVS vacuum press and our polyurethane vacuum bag. The video, which spans more than 9 hours, also covers veneer jointing and glue up using many of the tools and supplies offered at VeneerSupplies.com.
You will find a lot of information that mirrors and complements the information I provide here on the JoeWoodworker veneering pages. The DVD set is priced at around $79 USD plus shipping from Canada.
Questions & Answers
I've compiled a list of the most common questions about veneer and veneering on a special Frequently Asked Questions (FAQ) page. Be sure to check it out and feel free to contact me if any of your questions are not answered.

|