|
VQ 1: What is a balance veneer and why do I have to use it?
This type of veneer balances the number of layers on the plywood (counting outward from the center) or other substrate. Since you are adding a veneer layer to the face, you also need to add a veneer layer to the back side of the panel to prevent warping.
The normally visible side of a veneered panel is often called the "face" side and it's an important part of the project look. The back side of a panel is often forgotten despite the fact that it is a critical part of a successful veneer project. The veneer used on this often unseen side is typically called a "backing" veneer but a less-confusion name is "balance" veneer.
These are usually straight-grained hardwood veneers that are inexpensive and easy to work with. A balance veneer does not have to be a lesser grade veneer if the back of the panel will show. In that case, most craftsmen would choose to use a veneer of similar color, grain, and species. But when the back side of the panel will be unseen, a balance grade veneer is the way to complete the panel without spending a fortune.
More information is available at this link.
(Back
to top)
VQ 2: What is paper backed veneer and why should I use it?
Paper backed veneer is exactly what the name implies. It's a real wood veneer permanently bonded to a paper backing. The backing is generally available in a 10 and a 20 mil thickness.
A 10 mil backing is best for most projects. However, a 20 mil version is available for situations where the substrate is less than perfectly flat. In this case, the extra paper thickness allows the veneer maintain a more consistent look after application. Keep in mind that the 10 and 20 mil thickness is a reference to the thickness of the paper backing, not the veneer face.
Check out this link for more information.
(Back to top)
VQ 3:
Why did my panel warp when I removed it from the press?
The warping happens when the veneer, which has slightly expanded from the moisture of the glue, begins to shrink as the adhesive dries and cures. The glue has its "grip" when the panel begins drying so it is pulling the project board in the direction of the shrinking movement. When the pull is even on both sides, the panel stays flat. The key is to allow both sides of the panel to cure at the same rate.
Click here to learn how to avoid warping.
(Back to top)
VQ 4:
Where can I learn more about veneer adhesives?
Check out our Veneer Glue FAQ page.
(Back to top)
 VQ 5:
Will veneer softener affect the ability of the veneer to take a
stain and will the softener work on thick veneer? VQ 5:
Will veneer softener affect the ability of the veneer to take a
stain and will the softener work on thick veneer?
Super Soft 2 veneer softener will not affect the ability of the veneer to accept a water-based or solvent-based stain.
The level of softening depends on several factors including thickness, species, grain type, and moisture content. Thickness is one of the most important factors. I've tested the veneer softener on some thicker veneers and had occasional success.
(Back to top)
 VQ 6:
How do I veneer with copper sheeting? VQ 6:
How do I veneer with copper sheeting?
There are a couple of options when veneering with copper. The ideal method is with a vacuum press and TC-20 copper adhesive. The manufacturer of the copper veneer recommends solvent-based contact cement if you do not have a vacuum press or other means of clamping the panel.
See the Copper Veneer Guide for more information.
(Back to top)
VQ 7:
How do I use a veneer saw?
Cutting
veneer with a veneer saw is a simple process. Place a straight edge along
the projected seam/cut line, and lightly saw into the veneer (along
the entire length of the seam) until the cut is complete. It is
imperative that the straightedge be absolutely true. While sawing
the veneer, place adequate pressure downward on the straightedge.
You should also make certain to hold the saw 90° to the veneer
face by keeping it firmly pressed against the straightedge. For
more details, please click here.
(Back to top)
VQ 8: What is veneer edge banding?
Edge banding is real wood veneer that is pre-sanded and typically pre-glued with a reactivatable hot melt adhesive. It is used to cover the edges of sheet stock such as plywood, particle board, and MDF. Edge banding is adhered to the edge of the panel and then flush-trimmed using a router bit, razor knife, or a purpose-made edge banding trimmer. The only tools required for application are a clothes iron and an edge-trimming tool. Any cheap clothes iron will work but I've found that the smaller travel size versions are the easiest to work with. For more information about edge banding and its application, see our Edge Banding Guide.
(Back to top)
VQ 9:
Can a vacuum press be used for veneering over a bending form?
There is no infallible way to answer this because it depends on the thickness of the layers and the severity/complexity of the curves. Thicker plies and tight bends will limit the effectiveness of the vacuum system. Keep in mind that a vacuum press can create 1,400 lbs per square foot of pressure but severe bends and thick plies are better suited to hydraulic or other mechanical forming methods. See
this page for some pictures. Also keep in mind that polyurethane
bags are better than vinyl bags for this type of work.
(Back to top)
VQ 10:
What causes bubbles and ripples in veneered panels?
Most cold press veneer glues are water-based. Bubbles and ripples are caused by the swelling of wood cells in the veneer due to the absorption of water content from the adhesive. This is true of raw wood veneers as well as paper-backed and two-ply veneers.
An understanding of water management is the key to avoiding this issue. To put it simply... avoid using too much glue, make sure the water has a place to go, and control the movement of the veneer while the water migrates away from the glue line and evaporates.
- Too Much Adhesive
By far the most common cause of ripples in a panel is from the application of too much glue. I highly recommend using a veneer glue roller to eliminate this problem. The surface should be completely and evenly covered with glue but not dripping wet. Draw a pencil line on the substrate before you apply the glue. Once the glue is spread onto the panel, you should be able to easily see a slightly obscure pencil line through the wet glue layer. If so, you probably have the right amount of glue applied. Remember that it's typically better to have less glue than to have too much.
The foam rubber roller offered at VeneerSupplies.com allows you to accomplish this easily and I highly recommend it. I've seen this glue roller solve more problems with gluing issues than I can count.
- Shop Temperature Too Cold
The minimum use temperature for X-Press veneer glue is 60°F and the minimum use temperature for Ultra-CAT is 70°F. It's critical to stay above these temperatures. If the shop is below the minimum use temperature, then the glue will not cure and the moisture from the adhesive will migrate deep into the wood cells causing swelling issues. I've heard that some people toss a heating blanket over the vacuum press bag to prevent issues associated with cold shop temperatures. If you are using a PPR glue, this can speed up the curing time and it supposedly makes the bond even stronger.
- One Surface is Not Porous
The water content in the glue has to migrate out of the bonding polymers before the adhesive can get a bite on the veneer. This water content has no where to go if the substrate surface is not porous. Instead of migrating into the substrate, it moves into the wood veneer and saturates it with water which then causes swelling of the wood cells and leads to bubbles/ripples in the panel.
You can easily avoid this issue by scuff sanding the substrate with 60 to 100 grit paper before the glue is applied. I recommend scuff sanding MDF, particle board, and plywood substrates even if they appear to be porous without sanding. Substrates such as metal and plastic can not be made porous with scuff sanding and should not be used with water-based veneer adhesives.
- Clamping the Panel Longer than Needed
Another common source of bubbling is caused by pressing the panel for too long. Follow the instructions on the glue bottle and do not exceed the recommended clamping time. This is especially critical for Better Bond X-Press veneer glue. Never exceed 60 minutes of clamping time for this adhesive.
Despite the tendency of the veneer to buckle with the adhesive moisture, the press keeps the veneer flat while the glue makes a partial bond between the veneer and substrate. An hour of clamp time is enough to get a partial bond. The rest of bond strength occurs when the panel is removed from the press where the moisture can quickly evaporate allowing the glue to fully cure. This curing can not occur if the panel is clamped for too long. This leads to excess saturation of the wood cells with water which then creates a swelling and rippling that even a vacuum press can not overcome.
- Not Enough Evenly Distributed Pressure
Another cause of bubbles/ripples is inadequate pressure while the panel is being pressed. This rarely occurs when a vacuum system is used to press the panel. It happens most often when a panel is pressed with clamps and/or weights because many users underestimate the amount of evenly distributed pressure that is required to keep a veneer flat while the adhesive cures. Check out the first section of this page if you are planning to use clamps or weight to press your veneered panel.
If you are using a vacuum press and experience bubbles or ripples in the veneer panel, then simply adjust your vacuum level slightly higher. If you are using 18" of Hg vacuum, then bump it up to 21" Hg. Flat cut veneers (especially maple and cherry) will often require higher vacuum to stay flat in the vacuum press.
Fixing Veneer Bubbles
Thanks to Steve Worzman
- If the bubbles are from excess glue, you can sometimes iron over the ripples and re-flow the glue to a certain extent. Place a damp cotton cloth over the ripple for 15 minutes and then iron it with a clothes iron on the medium-high setting. It is critical that you do this as soon as you see the bubble issue. The longer you wait, the more difficult it is to get the ripples out. Keep in mind, that this does not always remove the ripples completely.
- If the bubble is an air pocket, you can raise the bubble further by wiping the panel with a wet towel. Within a few seconds, the bubbles will slightly expand. Then draw a circle around each bubble with chalk.
- Mix up some veneer glue so that it is thin enough to go through the tip of a plastic glue injector. You can add up to 5% water without affecting the integrity of the adhesive.
- Using a razor knife, slice the bubble open. Be sure to follow the grain or if the veneer is a burl, follow the curve of the burl grain.
 Lift open the cut slightly with the edge of the razor knife and inject the glue under the veneer on each side of the cut. Since the veneer was previously dampened, it should have some flexibility. Lift open the cut slightly with the edge of the razor knife and inject the glue under the veneer on each side of the cut. Since the veneer was previously dampened, it should have some flexibility.
- While wearing gloves, squeeze all excess glue out of the blister and wipe off with a wet towel.
- Then use a clothes iron (set to high and with no steam) over the blister, squeezing any more glue out, and apply pressure. PPR glue dries very quickly with heat but regular veneer glue is fine as well. In less than 15 - 30 seconds the bubble will be glued down flat. If using a PPR glue, be sure to wear goggles and a chemical filter face mask as the heat cure liberates formaldehyde gas.
- When fully dry, you can sand off the excess glue and finish the panel.
(Back to top)
VQ 11:
What causes veneer tape to leave areas of discoloration on the veneer and how can I prevent it?
The usual cause of this discoloration is the adhesive on the veneer tape. If the tape is oversaturated with water, the glue on the tape can penetrate into the wood cells and coat/seal them. This alone creates markings or "tape shadows", but sometimes, this issue becomes far more evident when a stain is applied because the wood cells can no longer absorb the stain.
The key is to prevent the tape glue from penetrating the surface of the veneer. The tape shouldn't be soaked. Instead it should be just lightly moistened. Over-dampening the veneer surface when removing the tape can also cause the same problem since the excessive water can reactivate the glue, thin it out, and let it permeate the surface.
Additional Prevention Tips:
- You can reduce the chance of the veneer tape leaving residue on the finished panel by dabbing the tape with a heavily dampened (but not soaking wet!) paper towel. Give it a minute or two and the tape should loosen up and easily peel off. As long as the tape is not super-saturated with water, most of the adhesive should stay on the tape and not on the veneer.
- Then wipe down the area with denatured alcohol to remove any residual tape adhesive. Let the panel thoroughly dry before sanding it. Otherwise any remaining adhesive will booger up the surrounding veneer when you sand the panel.
- Some woods have a tendency to develop dark spots from excess moisture in and around the taped areas. This can be prevented in most cases by using distilled water to moisten the veneer tape for application and removal.
- There is a developing trend in which water-activated veneer tape is not used on veneer joints. Instead, some people are finding that some (but not all) removable crepe-paper tapes are better suited to veneer seams since no water is required to activate them. Consider using the elastic veneer tape offered at VeneerSupplies.com.
- Though it is uncommon, lightened areas can occur when veneer tape is removed. This is caused by the veneer tape which blocks UV light (from the sun or even fluorescent lighting) which normally causes the veneer to darken. This can be prevented by covering the veneered panel with a blanket or piece of cardboard until the veneer tape is removed.
Another Consideration:
If
you're using a single layer of the 3 hole veneer tape, you can place it on the glue side
of the veneer layup. That will eliminate the problem all together. Yes... it's true that most panels can be veneered with the tape side down if you are using only a single layer of 3 hole tape.
(Back
to top)
VQ 12: I don't have a vacuum press. Is there any other way to veneer a panel?
Here are some other ways to veneer a panel.
- You can use the Better Bond X-Press veneer glue and sandwich the veneered panel between to thick, flat boards (called platens) and put as many clamps as possible around them. The key is to evenly distribute the pressure so a thick platen (minimum of 1.5") is needed. Be certain to line the platens with wax paper so the panel doesn't get stuck inside!
- Try iron-on veneering with Heat Lock. Click here for details.
- You can also apply veneer in the traditional method which uses hot hide glue. Visit your local library for more information. There are several vintage books that cover this topic.
- Paper backed veneers can be applied with contact cement and a simple veneer scraper.
For more information, check out this link.
(Back to top)
VQ 13: Is there a way to prolong the life of a veneer saw?
I've been using the same veneer saw for several years and I've found a few ways to maximize the life of the blade.
- Make sure you start with a good quality veneer saw that has a proper grind.
- Cut the veneers on a non-abrasive surface such as plywood or MDF. Try to avoid cutting on hardwoods and plastics. I have some large sheets of cardboard that I routinely use for trimming veneer. This not only protects the saw blade but also my work bench top.
- Most decent veneer saws have a grind that allows them to cut only on the pull stroke. If you try cutting on the forward (push) stroke, the blade does not cut and the teeth wear down faster.
- Cut with a rolling motion on the blade so that you use more parts of the saw. At the beginning of the pull stroke, the back end of the blade is contacting the veneer and the saw handle is a bit low. Gently roll toward the center of the blade as you begin sawing across the veneer. As you reach the end of the cut, roll up to the front of the blade. The saw handle will be slightly higher at this point. It's a very natural feeling and it comes about easily with just a few practice strokes.
(Back to top)
VQ 14: Can I leave the veneered panels in the press overnight?
I generally do not recommend leaving the panels in the vacuum press over-night. For most veneer adhesives, this can cause the glue to get "globby" which won't let the panel cure evenly. It can also create mold and ripples on the veneer. Remember, most liquid glues cure outside of the press. Inside the press, the glue is only "setting". Air is needed on the surface to let the water evaporate from the adhesive. For standard cold press glue, this happens 4 to 6 hours after the panel is removed from the press.
The flip side is Unibond and Ultra-CAT glues which are non-evaporative curing adhesives. I still do not recommend leaving them in the press for much longer than required.
(Back to top)
VQ 15: After my veneer arrives, what is the best way to store it?
If your veneer arrives rolled up, it's best to unroll it (slowly and carefully) and store it horizontally. In an ideal situation, you should place a board on top of the veneer to minimize seasonal changes in moisture content which can cause ripples. At the very least, a cover should be placed over the veneer to prevent color fading caused by exposure to UV and fluorescent light.
Some veneers will arrive with tape on the ends to prevent splitting during transit. To remove the tape without splitting the veneer, pull it off in the direction of the grain. If you pull it across the grain, it may tear the veneer. Some companies recommend that you leave the tape on the veneer until you are ready to use it. I don't recommend this practice. Why? Because veneers are capable of expanding and contracting with even the slightest change in humidity. The tape can cause the veneer to buckle when it tries to expand or split when it tries to contract. If your veneer has a split, you can prevent it from advancing by place small pieces of blue tape (or standard veneer tape) along the length of the split. This will allow the wood cells to shrink and expand each season without stressing the entire width of the veneer.
See this page for more information.
(Back to top)
VQ 16: I'm using a paper backed veneer but the veneer glue isn't giving me a good bond. Any suggestions?
Test the back of the paper backed veneer by applying a single drop of water to the backing. If there is still a bead of water after 5 seconds, then the backer is creating the problem with the adhesion. The solution is to scuff sand the backer with 100 grit sandpaper. This will allow the moisture in the veneer glue to transfer the bonding polymers to the paper backing and will give you the quality bond you expect.
(Back to top)
VQ 17: What types of material can I apply veneer to?
There are numerous substrates to which a veneer can be applied. Check out this article for more information.
(Back to top)
VQ 18: Why would I buy a complete vacuum press system if it's so much cheaper to use the Heat Lock glue and a clothes iron for veneering?
The iron and glue method is fine for small pieces but it has some disadvantages. To start, some veneers react negatively to the heat from the iron. I've found that bubinga and some crotch grain veneers do not respond well at all to heat. Additionally, the heat can cause the veneer to shrink which makes it difficult (but not impossible) to get tight seams between two veneers.
The vacuum press method eliminates these issues.
Seams stay tight because the glue forces the wood cells to expand.
The vacuum press and a good glue will give you flawless bond because you are making a "wetted" joint between the substrate and the veneer. This gives the bond "bite" and is why so many high-end furniture makers would use nothing else.
Don't get me wrong though. The iron on method is a viable veneering option. I use it from time to time on small projects and in places where a vacuum press just won't work.
(Back to top)
VQ 19:
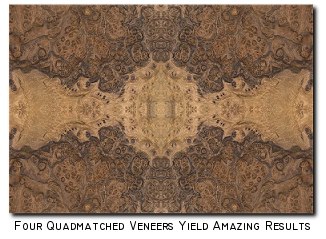
What is that mirror jig that I've seen in books that makes the veneer patterns?
This very simple jig is used to help visualize what a quadmatch or sunburst layup of veneer will look like when complete. It consists of two mirrors held together at one end with duct tape. The tape acts as a hinge and allows you to change the angle of the mirrors. When held at the appropriate angle, the  mirrors will show a multi-layered reflection of the veneer. mirrors will show a multi-layered reflection of the veneer.
Angle of Mirrors |
Veneers for Full Layup |
90° |
4 (Quadmatch) |
22.5° |
16 (Sunburst) |
30° |
12 (Sunburst) |
36° |
10 (Sunburst) |
You can make a wood jig that sets the angle very easily. Just use a miter saw and grooves cut in a small board at 22.5, 30, and 36 degrees.
(Back to top)
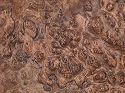
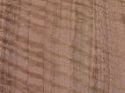
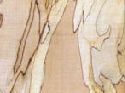
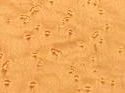
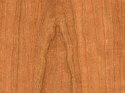
VQ 20: There are so many grain types and figures in veneer. Where I can learn more about them?
There is an article here at the JoeWoodworker website that discusses many aspects of veneer including grain types and figure.
(Back to top)
VQ 21: I can't find 1/8" thick veneer. Why is it so hard to find?
Just to clear things up, any wood that is 1/16" or thicker is generally not called "veneer". It is better referenced as "thin lumber". Now to answer the question... Simple economics.
- The veneer mill can yield a larger amount of usable square feet from a log by slicing the veneers as thin as possible.
- Thinner veneers are not only easier to slice, but are also easier to dry and keep flat. Thick veneers are notoriously difficult to keep flat and re-flatten.
- Thick veneers are very difficult to ship.
- Thin lumber is usually cut with a special machine that is designed only to cut this thickness. Normal veneer slicers simply can not create thin lumber.
- The machine designed to cut thin lumber usually wastes a lot of wood; whereas veneer slicing machines yield little to no waste.
- Because of the sawing process used to create thin lumber, it is usually put through a sanding machine. This is not needed on standard veneer thickness due to the slicing action that creates a smooth front and back on the veneer.
- All of these reasons change the profit that can be attained from a veneer log which causes the square foot price to skyrocket.
- Thick veneers are also highly prone to "cold creep" which is the phenomena in which the veneer expands and contracts on the substrate material often causing delamination problems. If you must use a thick veneer, you need an adhesive that is stronger than an ordinary glue. A pre-catalyzed powder resin (PPR) glue is ideal.
This information is not necessarily bad news for the craftsman. Almost any project that seems to demand a thick veneer, can be done with a standard veneer thickness.
(Back to top)
VQ 22: Is it ok to use a paper backed veneer as the "balance" or backing veneer on a panel if the face veneer is unbacked?
It's not a good idea to use a paper backed veneer for balancing a raw wood veneer panel since the paper backed veneer won't expand and contract at the same rate as a raw wood veneer. This expansion and contraction is caused by moisture from the glue and seasonal humidity changes after the project is finished. The end result could be a panel that warps over time. Overall, it's best to use a similar raw wood veneer to balance the panel.
(Back to top)
VQ 23: When I buy veneer sheets, how do I order them so that they can be bookmatched?
To successfully bookmatch, quadmatch or sunburst a veneer you need consecutive sheets. In other words they have to be in the order in which they were sliced from the log. About 99% of the veneers sold at VeneerSupplies.com are shipped consecutively. The veneers that are not consecutive are listed as "random" veneers.
(Back to top)
VQ 24: How do I go about sanding a veneer?
A raw wood veneer almost always requires a bit of sanding after it is pressed to a panel. I usually start with a 120 grit paper if I am sanding with a random orbit sander and work to 180 grit. If I am hand sanding, I start with 150 grit. It takes practice to know how far/deep you can sand a veneer. I've sanded through plenty of veneers by accident and it's just a process you have to learn. Check out tip #8 on this page for more information.
(Back to top)
VQ 25: How do I avoid or minimize bleed-through issue?
There are blog posts on at least two websites that suggest spraying the back of the veneer with lacquer prior to adhering the veneer to the substrate. I get so many emails about those posts that I sometimes want to scream. In one case the blogger applied yellow glue for the veneer work which is a huge mistake in my opinion, and it's possibly the root cause of the bleed-through issue since yellow glues can be very thin compared to a dedicated veneer glue.
So what's the problem with spraying lacquer on the back of the veneer? Water-based glues will not bond to non-porous surfaces and by spraying lacquer you basically make the surface non-porous. If one is hell-bent on spraying lacquer on the back of the veneer, then that person should also thoroughly sand the back of the sheet to remove the lacquer but possibly leaving some lacquer in the pores.
But the key here is avoid the cause which most often is using too much glue. In my two decades of veneer experience, I've found that having too much glue is far more common than not having enough. For many species, it takes surprisingly little glue to make a good bond to the substrate. The challenge is explaining how much to put down. I've written about this on my site in many places but it is certainly not a one-size-fits-all approach.
Some experience is needed to know how much glue is just right and this is especially true when dealing with a species prone to bleed-through issues. Obviously the veneers with the largest pores are most likely to have this issue and in most cases those veneers should have less glue applied to the substrate. It may take a few tries to get it right but I always recommend doing at least one test panel to make sure you have a good sense of how much is the right amount of adhesive. You should be willing to experiment a little because the knowledge that comes from it can be so valuable. Most veneer users would be surprised by how little glue is really needed to make a perfect veneer panel but they will never know until they try.
I'd also suggest that using breather mesh in a vacuum bag can help when too much glue is applied. Some users prefer a top platen board instead which can cause the glue that is forced to the surface to smear on the face of the panel. Breather mesh helps avoid this. The excess adhesive is brought to the surface and left as tiny beads of glue that are easy to remove with a cabinet scraper.
Very porous veneers such as oak, makore, and walnut are prone to bleed-through even when very light amounts of adhesive are used. Other than using a dedicated veneer adhesive and applying it correctly, there are two other ways to reduce bleed-through.
- Reduce the amount of pressure in the vacuum bag. For most veneers, you can set the press to 17" of Hg pressure and still get a good bond if the veneer is flat (not buckled or wavy).
- As a last resort, you can apply a coat of thinned veneer glue (50/50 with water) to the back of the veneer. Let it dry and it will seal the wood cells. Be aware that the veneer will want to "buckle" while the glue dries so you may have to tape it down to your work bench. Then gently sand the back of the veneer with 80 grit paper to roughen the surface.
If you've read this entire FAQ post, then you might be wondering why I'd recommend coating the surface with glue and yet I do not recommend spraying the back of the veneer with lacquer since both make the surface less porous. The difference is that a fresh coat of glue will bond to a light coat that has been scuff sanded on the back of veneer sheet.
Don't forget to test, test, test. Every veneer, glue, and vacuum bag situation can vary.
(Back to top)
VQ 26: How do I make a large panel with a burl veneer if I can't find a sheet that is large enough?
 Many burl and exotic veneers are not easy to find in extra large sizes and with some species, a large sheet sheet is just not possible at all. In many cases, when a large burl veneer is available, it will have voids, bark pockets, and other anomalies so it must be cut down to a size the excludes these "issues". To accommodate the need for a larger veneer, you'll need to join several veneers together in a bookmatch or quad match pattern. Learn more about this technique by clicking here. Many burl and exotic veneers are not easy to find in extra large sizes and with some species, a large sheet sheet is just not possible at all. In many cases, when a large burl veneer is available, it will have voids, bark pockets, and other anomalies so it must be cut down to a size the excludes these "issues". To accommodate the need for a larger veneer, you'll need to join several veneers together in a bookmatch or quad match pattern. Learn more about this technique by clicking here.
The good news is that bookmatched and quadmatched veneers can yield some incredible imagery and patterns. Check out our "Amazing Bookmatches" page to see what you can accomplish!
Jointing two or more veneers together is a fairly simple task but if you need a larger sheet with a minimum of fuss, then consider using a paper-backed veneer which contains multiple veneers joined together in sequence to make a large sheet with a paper backing.
(Back to top)
VQ 27: Are there any good books about vacuum pressing out there?
Yes! There are three exceptional books on veneering that would make great additions to a woodworking library.
The Complete Manual of Wood Veneering by William Lincoln
It reads more like a high school text book than a "manual" but it is very thorough and well organized. It's currently out of print but it does show up on eBay rather often.
 by Mike Burton by Mike Burton
This book was out of print and hard to find for quite a while but it was revised and published again in June of 2006. The new version includes a section on marquetry which was a great complement to the other chapters. Mike Burton covers various forms of veneer application including vacuum pressing, iron-on veneering, and more traditional methods. The book also includes a few well designed veneering projects. One thing that I really enjoyed is the author's down to earth writing style. He writes as if he was speaking directly to you and his comments are insightful and sometimes humorous.
 Woodworker's Guide to Veneering & Inlay by Jonathan Benson Woodworker's Guide to Veneering & Inlay by Jonathan Benson
I have admit that this book is probably going to be one of the de facto standards for veneering guides. The author clearly explains nearly every aspect of veneering from log to finished project without over-stressing any particular concepts. This keeps the reading enjoyable, interesting, and wonderfully helpful. If you're interested in vacuum bagging your veneered projects, Jonathan Benson's book has it covered.
(Back to top)
VQ 28: Do I have to use a balance/backer veneer if I use a paper backed veneer on the front of the panel?
I always use a paper backed veneer on the back side of my panels if the face side uses a paper backed veneer. Others say they never use a backer/balance veneer and haven't had any warping problems. I think this largely depends on several factors.
- Attachment Method - If you're plan is to fasten the panel to a structurally sound surface, you may be able to mechanically force the veneered panel to lay flat.
- Substrate Thickness - a thicker substrate will not warp as much as a thinner one. The downside is that a thicker substrate may be harder to force to lay flat.
- Adhesive Type - Water based adhesives can cause the veneer to expand slightly. The veneer will shrink when the moisture evaporates from the panel and this can cause warping.
The best option is to apply a cheap paper-backed veneer to the back side of the panel with the same adhesive and bonding method that you used on the face sides. This is what I do and I never have to worry about warping.
(Back to top)
VQ 29: If my panel doesn't come out right, how do I remove a veneer from the substrate?
There really is no easy way to remove veneer that has been applied with common veneer adhesives. The nature of the veneer glue is to make an exceptionally strong bond thereby making it very difficult to remove a veneer intentionally. In some cases, you may be able to heavily sand the panel to remove the veneer and adhesive. Ultra-Cat veneer glue generally is the easiest to sand off because it doesn't gum up sand paper as much as other adhesives. However, in most cases you'll probably find it easiest to just remake the substrate panel and start fresh.
(Back to top)
VQ 30: Can I bond wood veneer to a solid wood substrate?
Yes... but be aware of movement. The problem with a solid wood substrate is that it can expand and contract (albeit slightly) with seasonal humidity changes. When a solid wood substrate is needed, you'll find that quartersawn lumber is ideal since it has less seasonal movement than flat cut lumber. You'll also want to use a hard-setting PPR adhesive like Ultra-Cat.
(Back to top)
VQ 31: How can I determine if my project is too wide or tall for a vacuum bag?
There are times when you may need to put a relatively large project inside a vacuum bag. Most vacuum bag suppliers offer a 54" maximum width on their bags. You can visually determine if your project is too big for a vacuum bag by using the string theory below.
You can determine if your project will fit inside a 54" wide bag by cutting a piece of string that is 104" long (or double the width of the vacuum bag minus 4 inches). Tie the ends of the string together so you have a string loop. Find of the area of greatest girth on the project. Drape the loop over and around the project. Now simply imagine that the string is a cross-section of the bag. Use pieces of tape to hold the string against each side of the project. Do this all the way around the project so that there are no gaps. This will help you visualize the way the bag will pull onto the project. If you can apply pieces of tape to hold the string against each part of the project, then it should fit inside a vacuum bag.
If there are gaps where the string will not lay flat against the project surface because there is not enough string left, then the project is too large for the bag.
(Back to top)
VQ 32: How do I veneer over my plastic laminate countertops or melamine cabinets?
Use a paperbacked veneer and a solvent-based contact cement to make this work. Thoroughly rough the surface of the laminate with 60 grit sandpaper. Wipe off any sanding dust and then apply the contact cement as directed on the label. The contact cement will need to be applied to the veneer and the substrate. When the cement has set up, apply the veneer and use a veneer scraper to make the bond permanent. Be sure to follow the "center-line" scraping technique that is shown on the veneer scraper product page. When the bond is secure, trim the excess veneer with a flush-trimming router bit.
(Back to top)
VQ 33: What adhesive should I use to apply a paperbacked veneer to a project that has a clear coat finish on it?
No easy answers here. It is very hard to bond veneer to a non-porous surface. With any water-based adhesive, you must have a porous surface. On non-porous surfaces, you have to use a solvent based contact cement or PSA veneer. If you opt for a solvent based adhesive, you must scuff sand the substrate with 60 grit sand paper to give the adhesive some "bite". If you use PSA, just a very light scuff sanding will suffice. But in either of these two cases, you'll need to test first. Why? Because solvent based contact cement can cause certain finishes (on the substrate) to soften and that will make a huge mess of the project. With PSA, you'll want to test because the PSA will not stick to the surface if it is oily or has even a trace of silicone on the surface. Since silicone can be found in some furniture polish, this is a very real possibility.
(Back to top)
VQ 34: Can I use window screen material as breather mesh in my vacuum bag?
The answer is both yes and no. Window screen material can create a pathway for the flow of vacuum. Several users have sent messages saying they had no issues other than a moderate increase in the amount of time it took to draw full vacuum in the bag. It is important to know that a veneer that is not completely flat is not likely to flatten under window screen material; you can get lumps in the finished panel. The other issue is that any adhesive that bleeds through the veneer will smear back onto the surface of the panel. Our breather mesh has a much wider/open weave than screen material so glue that comes through the veneer beads up and can be easily scraped off. I've also found that breather mesh is much easier to slide into the vacuum bag than screen material.
(Back to top)
VQ 35: What should I do if I can't find a species of edge banding that matches my face veneer?
Use scissors (for paperbacked veneer) or a veneer saw (for 2-ply and raw wood veneer) to cut your own edgebanding from the face veneer stock. Then use Heat Lock glue to bond the banding to your project. With heat from a clothes iron, you can bond any non-glued edgebanding, including one cut from a piece of veneer to any porous substrate.
(Back to top)
VQ36: How do you protect the veneer edges that are to be trimmed after pressing from being crushed while in the vacuum bag?
When building a veneered panel from scratch, try to avoid having any veneer overhang by simply cutting the substrate larger than the required final panel size. Cut the substrate 1" larger than the required size of the finished panel on all 4 sides. Then lay up the veneer .5" larger than the required size of the finished panel on all sides. Then center the veneer on the substrate after the veneer glue is applied.
After the panel cures, trim the panel to size on the table saw with a plywood crosscutting blade. If the veneer isn't perfectly aligned on the substrate, cut a starting straight edge with a band saw or jig saw and then clean up edges on the table saw.
| Example: |
| Step 1 |
Required Panel Size |
22" x 46" |
| Step 2 |
Substrate Size
|
24" x 48" |
| Step 3 |
Veneer Size |
23" x 47" |
| Step 4 |
Finished Panel Size |
22" x 46" |
If you are re-veneering an existing panel, the information above is not applicable. To answer the question at hand consider the two possible types of pressing methods.
Vacuum Bagging with Breather Mesh
Since breather mesh will allow the bag to pull onto the sides of the substrate, it's best to cut the veneer as close to the final size as possible. This is an important step because excess veneer overhanging the substrate will break off as the bag pulls against the project. In most cases, the breaking point of the veneer will not occur right at the edge of the panel. Instead, it will break on the panel surface leaving an imperfect edge that can not be trimmed.
Vacuum Bagging with Platens (finally, an answer to the question)
A rigid top platen will not bend over the edge of the substrate and thus the veneer will not bend and break over the edge. To get this right, you'll need to cut the platen to the size of the project or simply insert some spacer blocks to support any areas where the top platen overhangs the project surface. Details about this technique can be found at the bottom of this page.
(Back to top)
VQ37: How do I trim excess veneer from my panel?
There are several options for trimming. I prefer to oversize my substrate and veneer. Then I just cut the panels to size on my table saw. There are two things you can do to minimize tear out and splintering on a table saw. The first is to use a saw blade with plenty of teeth. These are typically called plywood crosscutting blades. Also set your saw blade as high as safety will allow. A higher blade height pushes down harder on the veneer as the cutting takes place.
When the project panel does not allow for me to oversize the substrate and veneer, I typically opt to trim the over-hanging veneer with a veneer saw or a flush cutting router bit. By far, the best type of router bit to use in a handheld router is a flush-trimming down-cutting spiral bit with ball bearing. I have these for sale on the VeneerSupplies.com website. The down cutting action presses the veneer (and chips) toward the substrate. It is the downward cutting action that differentiates this type of bit from standard flush cutting bits where the cutting action is lateral.
(Back to top)
VQ38: Can contact cement be used when two paperbacked veneers are joined side by side?
It's never a good idea to use contact cement when there will be a joint line because contact cement dries soft/flexible. Seasonal changes in humidity can cause the veneer to expand or contract which will create ruptures or gaps at the seam line. This will occur even if the panel has a finish coat applied.
Some craftsmen use molding to cover the seam if contact cement is the only option for bonding the veneer to the substrate.
(Back to top)
VQ39: What can I do to make sure a maple veneer bonds perfectly to the substrate?
Maple veneer can be a challenge to bond. Even solid maple lumber can be troublesome which is why this species is often the reference wood used by glue manufacturers when testing an adhesive. Whether we are referring to veneer or lumber, there are ways to improve the bond.
Glue-related issues on a veneered panel are typically caused by the failure of the glue to penetrate the surfaces to be bonded. The wetting agents found in all veneer glues work to make the adhesive polymers saturate the pores of the wood and substrate. This is how the adhesive gets its "bite" on the surfaces. Some of the wetting agent will flash off or evaporate once the adhesive is spread onto the substrate. The rest of the wetting agent will absorb into the pores of the materials being glued together. The key is to make sure the wetting agent saturates the pores of the project surfaces. Here are some tips.
- Always scuff sand the substrate with 80 or 100 grit sand paper. This will remove any burnishing that prevents the wetting agents from penetrating the surface. If the substrate is plywood, particle board, or MDF you can be sure that scuff sanding will greatly improve the bond strength.
- The slicing and press-drying of a maple veneer can cause the wood cells to become non-porous. So it's always a good idea to open the pores again by scuff sanding the back of a maple veneer. In fact, this is true of any species including the exotics. Any kind of shimmer or light reflection that can be seen on the surface of a veneer should be considered evidence that scuff sanding is needed. Doing this allows the wetting agent in the adhesive to flow adhesive polymers into the wood cells.
- It's a good idea to work especially quick when using a maple veneer. If the adhesive is open to air, then it is obviously drying out and the wetting agents are evaporating.
- Be certain to have adequate pressure on the panel. Most professional woodworkers agree that significant pressure is needed to force the adhesive into the pores of the veneer (especially maple) and substrate. A vacuum press is the ideal tool for creating evenly distributed pressure on a veneer panel.
- A bit of investigative work is necessary when a veneer does not bond well to the substrate. Use a razor knife to cut open the area where the veneer did not bond. If the glue is bonded to the veneer but not to the substrate, it is typically because the surface was not made porous by scuff sanding.
If you find that the glue has bonded to the substrate but the veneer has no evidence of adhesive penetration, then it's best to evaluate the veneer preparation and adhesive mixing process. Did you scuff sand the back of the veneer? Did you mix the glue with the correct amount of water (assuming you have a glue that requires mixing)? Did you spread the adhesive too thin? Did you wait too long before applying the veneer to the glue surface and getting the panel clamped? Did you use enough clamping pressure? With these answers and the information provided above you may be able to determine the cause of the issue.
(Back to top)
VQ40: Why does my veneered panel look darker than it did a few months ago?
All woods change color when exposed to UV light including normal day light. Some species such as walnut will lighten but most will darken and/or get an amber tone. Maple always darkens a bit and will continue to do that for quite a while. Also, some finishes will cause darkening immediately upon application. Oil based top coats such as polyurethane will darken veneers more than most other finishes and these finishes (and many others) can themselves develop an amber tone after exposure to day light.
Water based finishes often do not amber the wood color as much as oil based types. However, the water based finish will not bring out of the true depth of the grain pattern. Spray lacquers fit somewhere in the middle between the coloring effects of oil and water based finishes. Lacquer often gives a good depth of grain without too much initial yellowing. There is also a type of lacquer based finished called "water white" which shows excellent depth of grain and dries clear as water but it typically requires spray finishing equipment.
(Back to top)
VQ41: Can a previously veneered and finished panel be sanded and re-veneered with cold press veneer glue?
The old veneer should be removed first and then cold press glue can be used as long as the old adhesive is completely removed. This means sanding down below the line of glue penetration on the substrate surface. Very porous substrates can deeply absorb glue polymers so in some cases, scraping with a card scraper is ideal. When sanding/scraping is finishing, it is a good idea to test the substrate with a drop of water in several places. If the water is absorbed quickly, then it is probably porous enough to use a water based veneer glue.
(Back to top)
VQ42: Why can't I clamp the veneered panel for more than 60 minutes?
Cold press adhesives cure by evaporation. In a vacuum or mechanical press, there is very little air movement at the glue line and because of this, there is very little curing. If the panel is pressed for too long, mold can form on the veneer. This is especially true with cherry and maple. Clamping for more than 60 minutes can also allow the glue to over-saturate the substrate and cause swelling. For cold press glue, always press the panel for 45 to 60 minutes and then let it cure outside of the press for 3 to 4 hours.
(Back to top)
VQ43: How do I get rid of mold that formed on a panel while it was in the vacuum bag?
Let's start with mold prevention first. Mold spores are every where... on your clothes, your furniture, and (gasp!) even on your wood veneers. With the right temperature, the spores can "bloom" if given the right amount of moisture. This is very common in cherry and maple.
Now keep in mind that many veneer adhesives contain water. The water content in veneer glue creates a humid environment inside the vacuum bag and this leads to mold blooms if you press the panel for too long or if you use too much glue. An ounce of prevention is worth a pound of the cure in this case so don't press a veneer panel with a standard cold press veneer glue for longer than 60 minutes and avoid using excess glue.
To remove small "dots" of mold from a veneered panel, wipe on a light coat of oxalic acid (wood bleach) which is available in most hardware stores. It is often used to clean wood decks. Follow the directions on the container. Be aware that if it is mixed too strong, darker veneers like walnut will lighten up a bit.
(Back to top)
VQ44: How do I prevent the mesh from leaving marks in the veneer?
There are only two causes of markings left by breather mesh and both are easily preventable. If there is too much glue on the substrate, the veneer will float on the adhesive surface and the mesh will create quilt-like markings. Obviously the key is to use less glue.
The rule of thumb is that the surface of the substrate should look evenly covered with veneer glue. It should not be dripping wet. A good test is to draw some pencil lines on the substrate and then apply the glue. If you can readily see the pencil mark on the substrate (through the adhesive), you have the right amount of glue. If you can't see the pencil line at all, then you might have applied twice as much glue as necessary.
The second cause is too much vacuum. It's a good idea to lower the vacuum level to 17" Hg on softer woods like walnut and redwood to prevent markings from the mesh.
(Back to top)
VQ45:  Is there a video online or a DVD about vacuum pressing and veneering? Is there a video online or a DVD about vacuum pressing and veneering?
There are several video's on YouTube but nothing comes close to the comprehensive video lessons from Hendrik Varju. His latest 5-DVD set entitled "Simple Vacuum Veneering" shows various project uses for the Project: EVS vacuum press and our polyurethane vacuum bag. The video, which spans more than 9 hours, also covers veneer jointing and glue up using many of the tools and supplies offered at VeneerSupplies.com.
You will find a lot of information on this DVD that mirrors the information I provide here on the JoeWoodworker veneering pages. The DVD set is priced at around $79 USD plus shipping from Canada.
(Back to top)
VQ46: Is it OK to spray water on the veneer to prevent curling?
Veneer can have a tendency to curl up when it is placed on the wet glue layer on the substrate. It is not ok to spray the face side of the veneer with water to counteract the curling. The addition of water to the veneer causes excessive expansion of the wood cells which can cause the veneer to split later in the day as the moisture evaporates from the saturated wood cells.
(Back to top)
VQ47: How do I prevent the veneer from moving around on the substrate when I put the project into the vacuum bag?
I've had success using blue painter's tape to secure the veneer in place on the substrate. The only caveat is that some of the softer veneer species such as redwood and walnut can show a very slight impression from the thickness of the tape. This can typically be sanded out though.
(Back to top)
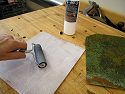
VQ48: Why did my paper-backed veneer develop ridges in the grain?
The most common cause of ridges is the incorrect use of the scraper tool. You stretch the veneer if you scrape across the grain (even slightly). Why does this happen? A solvent-based contact adhesive, which always stays rubbery, will loosen its grip and allow the veneer to contract over the course of just a few days. This is what causes the ridges. The key is to scrape with the grain and to do so from the middle of the veneer toward the outside as shown in the "center line" technique shown on the scraper product page.
Another cause is moisture content change in the veneer. If the veneer is stored in a location that has lower humidity than where it will be used/displayed, then it can expand when moved to an area of higher humidity. Keep in mind that a veneer is always a bit narrower when its too dry versus when it has fully acclimated. This is especially true for flat cut veneers. Certain species such as maple expand and contract quite a bit. If the scraper issue mentioned above is not the culprit, then humidity/moisture-content is the likely cause.
One other remotely possible cause is the finish coating. Water-based finishes can cause the ridging issue for the same reason as above. Water-based finishes add moisture to the veneer causing expansion and ridges. The key to preventing the problem is to apply a very light coat first and let it dry for a half-day or longer. Subsequent coats can be applied heavier since the initial coat will seal the wood cells and prevent over-saturation of water in the veneer.

(Back to top)
VQ49: How do I veneer a cylinder shape such as a drum shell?
There isn't much information online about veneering a cylinder shape and I've only had moderate success doing it in all of the years I've been a woodworker. However, a customer shared a picture and told me a little about it. The strap/band clamps in the picture below use duck cloth to spread clamping pressure around the shape. The ends are 2x4's with two dowels and mating holes to help align the ends. Then c-clamps are used to tighten the 2x4's together. I suspect these clamps are made to the exact size of the cylinder being veneered so it may take a bit of work to get them just right. If you can provide more information about this technique, please contact me and let me know.
(Back to top)
VQ50: Should I apply the table top veneer first and then apply the edge banding to the sides?
There are two options in a project like this. The most common method is to apply the veneer first, then trim it flush, and then apply the edge banding. The up-side to this method is that the easiest part (the application of edge banding) is left until the hardest part has been completed. If something doesn't go well with the veneer part, at least the user would not have wasted the edge banding. However, this comes with two caveats.
The first is that you can end up with a visible joint line on the top surface of the table between the veneer and edge banding. The other concern is the possibility of the edge banding being a catch-point for anything that is slid off the top edge of the table if the top of the edge banding is not perfectly flush due to seasonal movement.
There is an advanced technique that solves both problems. Some veneer users apply the edge banding first. They trim the veneer flush with the top of the substrate. Then they apply blue painter's tape over the edge banding before the top veneer is vacuum pressed onto the substrate. The blue tape prevents any glue squeeze-out from getting on the edge banding.
But here is the trick to doing this successfully. The veneered panel has to be set in the vacuum bag with the good side (called the "face") down against a smooth, flat, non-porous platen... preferably one made from melamine board and with a very light coat of paste wax applied and buffed off. The platen must be larger than the project surface and breather mesh must be used over top the panel. When the veneer work is complete, the blue tape is carefully. A bit of work using a razor blade is sometimes needed.
So you might be wondering why the veneer face can not be on facing up while inside the bag. One reason is that it prevents gravity from allowing any glue squeeze-out to roll down the face of the tape which might make it more difficult to remove. But there is another reason that is far more important. If the veneer is larger than the substrate (which it should be, to allow for flush trimming) then under vacuum, the breather mesh can pull the veneer down over the edge and cause it to crack. This doesn't happen when the veneer is pressed against a bottom platen.
It's important to note that blue tape can be hard to remove from certain species. A bit of heat from a hair dryer will sometimes help. Also note that the balance veneer can not be applied at the same time as the face veneer since it would have to be under the breather mesh and could also crack from being pulled over the edge. In this case, apply the balance veneer (facing the bottom platen) right after the face veneer has been applied.
(Back to top)
VQ51: What filler can I used to repair gouges in a substrate before the veneer is applied?
Wood fillers typically create a non-porous surface. The problem is that water-based adhesives do not bond very well to non-porous surfaces. When the filler area was minimal, I've had success with both Bondo and with Elmer's "Stainable" wood filler. I've also had success with Durham's Rock Hard Water Putty. Be sure to scuff sand the filled areas with 60 or 80 grit paper to get maximum bond strength.
(Back to top)
|